
Baking chicken breasts often involves a delicate balance of temperature and time to keep the meat moist and flavorful.
A common dilemma for many home cooks is ensuring that these lean cuts do not turn out dry or bland.
The key is in the preparation and cooking technique, ensuring that the chicken breast, which is naturally low in fat, retains its juiciness and tenderness throughout the baking process.
Preparation
Successful baking begins with proper preparation. This section navigates through the steps to ensure your chicken breasts come out perfectly tender and flavorful.
Choosing the Right Chicken
When selecting chicken, opt for boneless, skinless breasts. These are ideal for baking and easy to work with. Choose breasts that are about the same size to ensure even cooking.
Preparing the Chicken
Before cooking, pat the chicken dry with paper towels. This helps the seasonings adhere better and promotes even cooking.
If the breasts are thick, consider butterflying them or pounding them to an even thickness for uniform cooking.
Marinating and Brining
For added tenderness and flavor, marinate or brine the chicken breasts.
A simple brine can be made with water and a generous amount of salt.
If you choose to marinate, immerse the chicken in a mixture of olive oil, herbs, and spices for at least 30 minutes.
Preheating the Oven
The proper method for baking chicken breasts starts with preheating the oven, as the ideal temperature allows the meat to cook through without losing too much moisture.
Preheat your oven to 375°F. A properly preheated oven is crucial for cooking the chicken evenly and achieving the desired internal temperature.
Utensils and Cookware
Have the following utensils ready: a meat thermometer, a baking dish or sheet pan, and aluminum foil or parchment paper to line the pan if desired.
Using the right cookware can help avoid sticking and overcooking.
Preparation for Freezing
If you plan to freeze your chicken breasts for later use, wrap them individually in wax paper or plastic wrap. Then place them in a freezer bag to avoid freezer burn.
Safety Tips
Always wash your hands before and after handling raw chicken. Keep the chicken at a safe temperature before cooking, and always cook chicken breasts to an internal temperature of 165°F.
Seasoning Combinations
Create a basic seasoning blend with salt, pepper, garlic powder, and smoked paprika. Or explore with Italian seasoning, combining oregano, parsley, and thyme.
Infusing Flavors
To infuse flavors, consider adding fresh herbs or slices of lemon on top of the chicken before baking. A pat of butter or a drizzle of olive oil can add richness to the dish.
Baking
When baking chicken breasts, the primary goals are to achieve a juicy, tender result while ensuring the meat is cooked through to the safe internal temperature. Attention to baking time, temperature, and preparation methods will yield moist and flavorful chicken.
Baking Chicken Breasts
To bake chicken breasts, preheat the oven typically to 375°F (190°C).
Arrange the chicken breasts in a single layer in a baking dish, allowing space between each piece to ensure even cooking.
For added moisture, one can introduce a small amount of chicken broth into the dish, coating the chicken with olive oil or adding a pat of butter.
Test for Doneness
A digital meat thermometer is crucial to ensure chicken breasts have reached the safe internal temperature of 165°F (74°C).
Insert the thermometer into the thickest part of the breast without touching the bone. The juices should also run clear when pierced with a knife.
Resting After Baking
Allow chicken breasts to rest for at least five minutes after baking. Resting helps the juices redistribute throughout the meat, keeping it moist and juicy.
Variations in Cooking Time
Cooking time may vary based on the thickness and weight of the chicken breasts.
Thinner cuts may require as little as 20-30 minutes, whereas thicker breasts might need more time. In general, bake until the chicken reaches the proper internal temperature.
Achieving a Crispy Crust
For those desiring a crispy crust, coating the chicken with breadcrumbs before baking can provide that satisfying texture.
This works well in a casserole setting or when placing chicken on a wire rack within the baking dish to ensure heat circulation.
Baking from Frozen
Baking chicken breasts from frozen can be convenient, but requires an additional 50% longer cooking time.
It’s important not to crowd the pan and to season well to compensate for the lack of marinating time.
Post-Baking Steps
After baking, one must take care to properly finish the simple baked chicken to ensure it remains juicy and tender. The key is in the rest and the right accompaniment.
Serving Suggestions
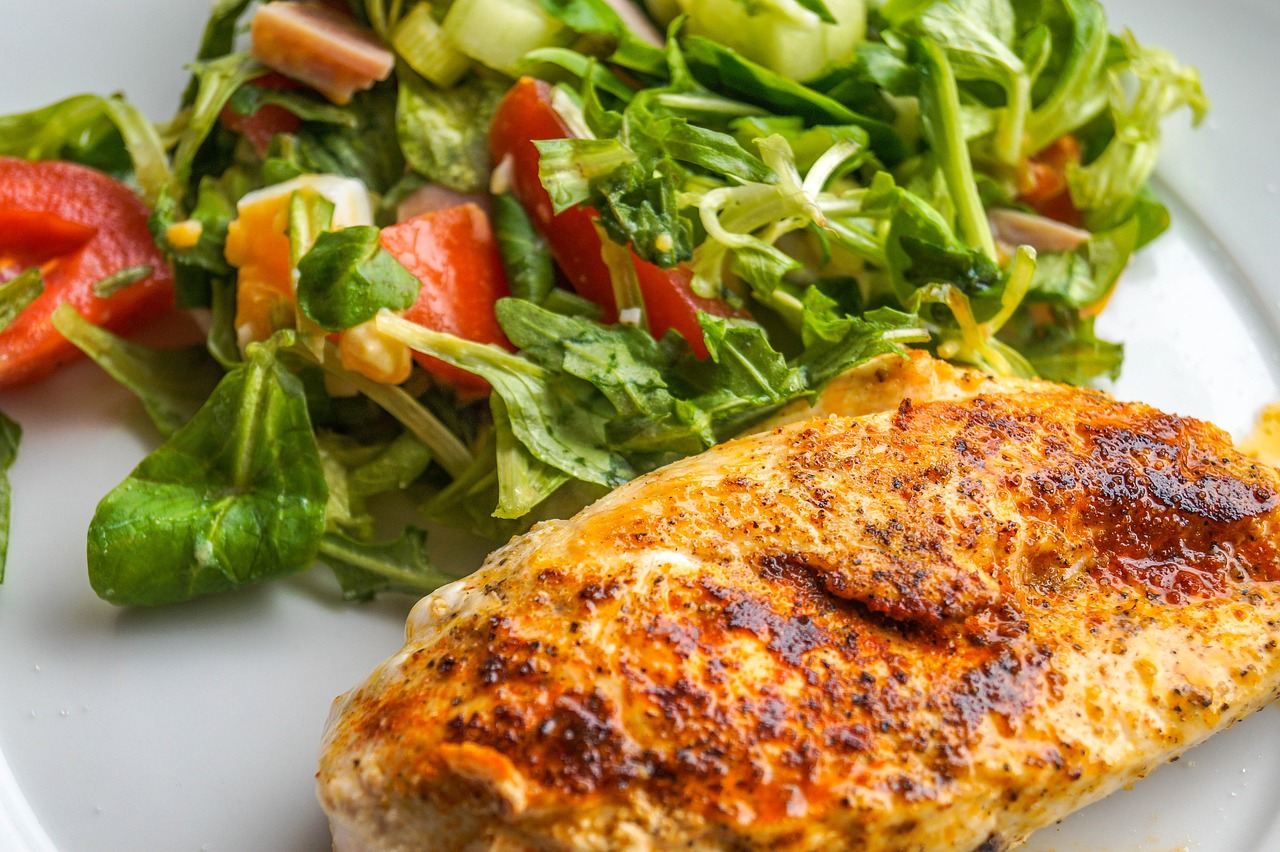
A well-baked chicken breast can be served in a plethora of ways. When aiming for a balanced meal, it pairs beautifully with a light salad or roasted potatoes, making it a versatile centerpiece.
For more creative side dish recipes, consider options like quinoa pilaf or a medley of steamed vegetables to complement the chicken’s flavor.
Resting and Slicing
Allowing the chicken to rest after baking is crucial. It helps retain the juices, making sure the meat remains tender and juicy upon slicing.
A rest period of about 5 minutes should suffice.
When cutting, one should use a sharp knife and slice against the grain for the best texture. Remember to cut slices in even thickness to ensure each serves up with equal tenderness.
Recipes and Variations
Baking chicken breast can be as simple or as elaborate as one desires, ranging from the basic seasoning of a classic baked chicken breast to the creative stuffings and coatings that enhance flavor and texture. Whether seeking a healthy option or a more indulgent meal, there is a variation to suit every palate.
Classic Baked Chicken Breast
To create a Classic Baked Chicken Breast, one needs only a few simple ingredients: chicken, salt, pepper, and olive oil.
Preheat the oven to 375°F for optimal cooking. Martha Stewart recommends seasoning both sides of the chicken generously before baking to ensure a juicy, flavorful result.
Stuffed Chicken Breast
For those who enjoy a richer dish, Stuffed Chicken Breast offers endless possibilities.
Incorporate a mixture of cheese, herbs, and vegetables, or even a spinach and ricotta filling for a sumptuous meal.
Cut a pocket into the chicken breast, fill, and then bake until the chicken is fully cooked.
Crispy Coated Chicken Breast
For a delightful crunch, a Crispy Coated Chicken Breast with a breadcrumb or parmesan crust is the answer.
Dip the chicken in beaten eggs, coat with breadcrumbs mixed with seasoning, and bake until the exterior is crisp and golden.
Low-Fat Chicken Breast
Health-conscious individuals may opt for a Low-Fat Chicken Breast.
Use minimal oil, select a lean cut, and incorporate vibrant seasonings for flavor without the fat. Herbs, citrus zest, and spices can all contribute to a tantalizing and healthy baked chicken breast recipe.
Chicken Breast with Vegetables
Baking Chicken Breast with Vegetables in a single dish is a convenient and nutritious option.
Choose a colorful array of vegetables, such as bell peppers, zucchini, and onions, and bake them alongside the chicken.
Roasting chicken alongside vegetables not only saves time but also allows the natural flavors to meld, creating a simple yet satisfying meal that caters to a variety of dietary preferences.
Pairings and Accompaniments
When baking chicken breast, the right sides can transform a simple dish into a complete meal. They will complement the lean and mild flavor of the chicken, creating a more satisfying dining experience. https://www.youtube.com/embed/7IE9drs4690
Salads and Vegetables
- Salads: A well-dressed salad can balance the meal with freshness. Chicken parmesan pairs exceptionally well with a crisp Caesar salad. Meanwhile, grilled chicken can be served atop a bed of mixed greens with a light vinaigrette.
- Vegetables: Roasted or steamed vegetables, like broccoli or asparagus, offer a healthy and flavorful side. For a hint of indulgence, a creamy spinach or artichoke accompaniment can turn simple baked chicken into a rich, comforting meal.
Starches and Grains
- Potatoes: Whether roasted, mashed, or baked, potatoes are a hearty option. Herbed roasted potatoes complement nearly any chicken dish, and garlic mashed potatoes make for a heartwarming pairing.
- Grains: Quinoa, rice, or couscous can be ideal choices, and they work well with a variety of seasonings. They are an excellent base for chicken tacos or mixed in with diced chicken for a nutritious salad bowl.
Sauces and Toppings
- Sauces: A flavorful sauce can elevate baked chicken breast from simple to spectacular. Salsa adds a zesty kick, perfect for when the chicken is served in tacos or as a topping for nachos.
- Toppings: For a classic Italian touch, top the chicken with marinara and mozzarella, and serve it with pasta for the perfect chicken parmesan. A drizzle of Dijon mustard adds complexity to sandwiches, while a dollop of creamy sauce can enrich soups.
Meal Prep and Storage
When meal prepping chicken breast, proper storage is crucial for maintaining freshness and preventing foodborne illness. Below are specific guidelines to refrigerate leftovers, freeze for optimal longevity, and safely reheat your chicken.
Refrigerating Leftovers
After baking chicken breasts, they should be stored in the fridge within two hours to prevent bacterial growth. Place leftovers in airtight containers or tightly wrap them in aluminum foil or plastic wrap. Properly stored, cooked chicken breasts can last in the refrigerator for 3-4 days. Use them as a ready-to-go protein source for salads, sandwiches, or quick meals.
Freezing for Later Use
To extend the shelf life of your chicken, freezing is an effective option. Before freezing, allow the chicken to cool down to room temperature. For individual portions, wrap the chicken breasts separately in freezer paper or plastic wrap and then place them in freezer bags. This method would apply to chicken thighs, legs, or wings as well. Labeled with the date, the chicken can be kept frozen for up to 4 months. Consider adding small portions of chicken stock or chicken broth to the bags to help retain moisture during reheating.
Thawing and Reheating Tips
Always thaw chicken in the refrigerator or using a microwave, never on the countertop. Frozen chicken should be used within 24 hours after thawing for the best quality and safety. When reheating, ensure that the chicken reaches an internal temperature of 165°F to kill any potential bacteria. Heat the chicken evenly in a 350°F oven or in a microwave, using a moist heat method like adding a bit of broth can help to keep the meat tender.
Nutritional Considerations
When baking chicken breast, understanding the nutritional content is vital for maintaining a balanced diet. Chicken breast is renowned for being a lean source of protein, contributing to muscle maintenance and growth. It’s especially low in fat content if the skin is removed.
The nutritional profile of a cooked, skinless chicken breast includes:
- Calories: A typical serving (3.5 ounces) contains roughly 165 calories.
- Protein: High in protein, with about 31 grams per serving.
- Fat: Minimal, usually around 3.6 grams, largely unsaturated.
When seasoning chicken, it is important to consider the use of salt as it contributes to the sodium intake. Although necessary for bodily functions, excessive sodium can lead to health issues, such as high blood pressure.
Here’s a simple breakdown of the nutritional entities of a 3.5-ounce serving of baked chicken breast:
| Nutritional Entity | Amount |
|---|---|
| Calories | ~165 |
| Protein | ~31g |
| Fat | ~3.6g |
| Sodium (without added salt) | ~74mg |
One should use spices and herbs to enhance the flavor without significantly altering the nutritional information. By keeping added fats, like butters or oils, to a minimum and opting for healthy cooking methods, one can enjoy chicken breast as a nutritious part of a meal. Always ensure that the chicken reaches an internal temperature of 165°F to guarantee both safety and retention of nutritional value.
Troubleshooting Common Issues
When baking chicken breast, common issues can often be addressed by understanding the cooking process better. This section provides solutions to ensure your chicken is moist, tender, and perfectly cooked.
Avoiding Dry or Tough Chicken
Dry or tough chicken breast is typically the result of overcooking. To prevent this, one should be vigilant about cooking time and oven temperature. Using a meat thermometer is crucial to check that the internal temperature reaches 165°F, as recommended by the USDA. Consider marinating or brining your chicken to enhance moisture, as seen in a recipe by Martha Stewart, which includes adding broth and oil or butter before baking.
Ensuring Even Cooking
Unevenly cooked chicken can result from variability in breast size and oven temperature spots. Pound the chicken to an even thickness to promote even cooking as suggested by Kristine’s Kitchen. This step minimizes the chances of some parts being overcooked while others are just right. Additionally, rotating the baking dish midway through cooking can mitigate hot spots in the oven.
Dealing with Undercooked Chicken
Encountering undercooked chicken after the specified cooking time can be due to incorrect oven temperature settings or simply the size of the chicken breasts. One should verify the oven temperature with an oven thermometer and always check the chicken’s internal temperature. If undercooked, return the chicken to the oven for additional cooking time, checking frequently to prevent overcooking. After cooking, let the chicken rest so the juices redistribute, a tip often neglected but highlighted by Savory Experiments. If issues persist, slicing the chicken can promote faster and more even cooking for future attempts.
Additional Tips and Techniques
When baking chicken breasts to achieve a flavor-rich and juicy result, it’s critical to consider oven temperatures, marinades, rubs, and the effective use of kitchen tools.
Oven Temperature Adjustments
Adjusting the oven temperature can drastically alter the juiciness of the chicken. For a quick cook that seals in juiciness, an oven set to a higher temperature like 425°F is ideal. Meanwhile, cooking at a lower temperature of 375°F might require longer but can result in evenly cooked meat. Using a meat thermometer ensures one does not overcook the chicken. The internal temperature should reach 165°F for safety and tenderness.
Role of Marinades and Rubs
Marinades and rubs are essential for infusing flavor into chicken breasts. A mixture of acids, oils, and seasonings can make the meat more tender and flavorful. Marinating for at least 30 minutes or up to 24 hours does the trick. Alternatively, dry rubs containing salt, pepper, and other spices enhance the flavor without moisture, creating a delicious crust on the chicken’s surface.
Using Kitchen Tools Effectively
To ensure even cooking and easy preparation, proper kitchen tools are key. Pounding the chicken breast to an even thickness promotes uniform cooking, which is critical for maintaining juiciness.
Additionally, lining a baking sheet with parchment paper before placing the seasoned breasts can prevent sticking and help with cleanup.
A meat thermometer is a chef’s best friend for gauging doneness without cutting into the meat and losing precious juices.